• Blog
  • Recipes
  • Lifestyle
  • Safer Skincare
  • About
  • Contact
Menu

Kate's Healthy Cupboard

Street Address
City, State, Zip
Phone Number
Healthy Lifestyle, Healthy Grain Free Recipes

Your Custom Text Here

Kate's Healthy Cupboard

  • Blog
  • Recipes
  • Lifestyle
  • Safer Skincare
  • About
  • Contact

Cranberry Pecan Crackers

November 19, 2013 Kate
Cranberry Pecan Crackers Recipe

The Holidays are here...so are all of the pumpkin recipes!  I haven't been in a pumpkin mood, so I'm trying to create some different holiday flavors this season.  First up, these Cranberry Pecan Crackers made with homemade dried cranberries.  I really like how this recipe turned out, the tartness of the cranberries with the bit of sweetness from the pecans works well together.  The crackers are almost a bit flakey and would pair well with a goat cheese spread if you can tolerate dairy.  I wish I could...sounds delicious!!

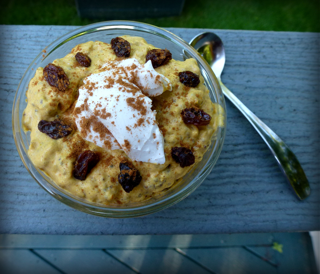
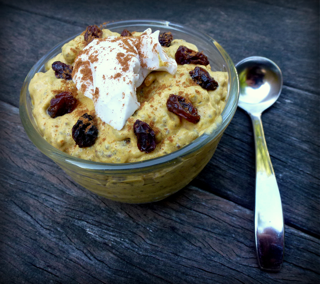
If you like the combination of cranberries and pecans, I highly recommend these Cranberry Pecan Muffins.  The topping alone makes these delicious and perfect for Thanksgiving morning!

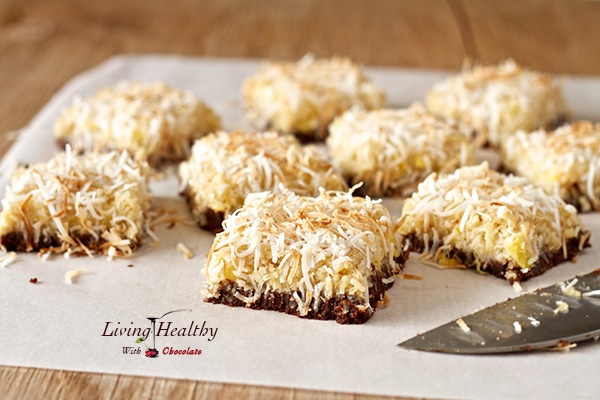
Recipe: Cranberry Pecan Crackers

Ingredients

Dried Cranberries:

  • 1 1/2 cups fresh cranberries
  • 1 tsp coconut oil, melted
  • dash of sweetener (optional)

Crackers:

  • 1 tbsp grass-fed butter, Ghee or coconut oil, melted
  • 1 -2 tsp granulated sweetener (I used Swerve for no sugar option)
  • Couple dashes of sea salt or more for salty crackers.  I sprinkled the top of rolled out dough will a tiny bit more salt

Instructions

Cranberries:

  1. Combine cranberries, coconut oil and sweetener in a bowl. Pour onto a parchment lined cookie sheet and bake at 250 for 2-2 1/2 hours.
  2. Remove from heat once the majority of berries look dried, set aside to cool.

Crackers:

  1. Place the pecans and cranberries in a food processor and combine until pecans look like coarse sand
  2. Add the egg, butter/oil, sweetener and salt to the mixture and pulse until combined and dough forms
  3. Place the dough between two pieces of parchment paper and roll out to about 1/8 of an inch thick
  4. Using a pizza cutter or sharp knife, cut crackers into desired size
  5. Bake at 350 for 10-12 minutes or until lightly browned. Thinner crackers will cook faster and you may need to remove outer edge crackers before you remove the inner crackers
  6. Let cool to crisp up and store in an airtight container. I love using glass jars for my snacks!

Quick notes

*I did not want to use store bought dried cranberries, they have added sunflower oil and white sugar. You can certainly substitute store bought, but you will probably only need 1/2 cup or less and leave out the sweetener all together.  These crackers will definitely turn out to be a sweeter version!!

Variations

*You can use a dehydrator to dry out the cranberries. I chose the oven method since many people do not have a dehydrator.

Looking for a great online source for nuts and sooo much more...check out www.nuts.com for a huge variety of baked goods and nuts and nut flours!  If you want to try Swerve in your holiday baking, use coupon code Kate10 for 10% off when you order online.

If you want to try Swerve or need to order more, use coupon code KATE10 for a discount.  If you are an Amazon shopper, would you be so kind to use my affiliate link to make your purchases.  It is at no cost to you, it does provide a tiny kickback to Kate’s Healthy Cupboard.  This allows me to continue making and testing recipes for free.  Thanks so much!!

*I have recently switched all of my skincare and makeup to a company that is free of 1,500 chemicals!!  I am so particular about what goes into my body, I need to be just as picky as to what goes on my body!  Your skin is your largest organ and absorbs chemicals into the bloodstream faster than the gut does!  I am vain when it comes to my skin and was so thrilled to find products that are anti-aging and work!!!  Check out BeautyCounter for more info!!  You will love it!!

Kate's Healthy Cupboard - Gluten Free Recipes
In Recipes, Snacks and Appetizers3 Tags Crackers, Dairy Free, Holiday, Paleo, Pecans
7 Comments

"Rice" and Bacon Stuffed Pumpkin

November 14, 2013 Kate
Rice Stuffed Pumpkin2

Here's a fantastic and fun recipe to add to your Thanksgiving menu.  I originally had this dish with rice in place of cauliflower a couple years ago and loved it!!!  I figured I could recreate this to be grain free by using cauliflower rice.  My inspiration came from this recipe, Pumpkin Stuffed With Everything Good.  It was made with bread crumbs, but along the way it has been changed to rice (I include how to do that variation below).  I made my own additions and changes as well.  I had to make some adjustments after trying to cook the cauliflower in the pumpkin. I decided it gets way too much moisture (which is perfect for cooking rice), so it needed to be cooked in a casserole dish.  Also, through trial and error, I decided that sauteing the onions and mushrooms in the bacon grease added some additional flavor.  You certainly can leave the entire pumpkin part out (unless you are using rice), but it makes for such a great fall presentation!Instructions

Recipe: “Rice” Stuffed Pumpkin

Ingredients

  • 1 medium sized pumpkin, about 3 pounds
  • 1 medium head of cauliflower, riced (run though a food processor)
  • 4 pieces of bacon, cut into 1/2 inch pieces
  • 1 1/2 cups mushrooms, chopped
  • 3/4 cup sliced green onion, greens and whites (about 4 onions)
  • 1/4 cup unsweetened vanilla non-dairy milk
  • 2 tbsp grass-fed butter, melted (optional, see variation below)
  • 2-3 garlic cloves, minced
  • 1 tbsp fresh thyme, chopped
  • 1/2 tsp sea salt
  • 1/8-1/4 tsp nutmeg
  • Pepper to taste

Instructions

  1. Place the riced cauliflower in a large mixing bowl and set aside
  2. Cook bacon in a skillet until crispy, remove from grease and add to the cauliflower. Pour out all but 2 tablespoons of grease.
  3. Place the onions and mushrooms in the skillet of grease and saute over medium heat until the onion is translucent and mushrooms are tender
  4. Add the onion and mushroom mixture, garlic, butter, milk, thyme, salt, pepper and nutmeg to the cauliflower and mix well
  5. Place the mixture in a casserole dish and cover
  6. Bake at 350 for an hour
  7. While the cauliflower is baking, cut off the top of the pumpkin and remove the seeds and guts
  8. Once the cauliflower is done, spoon it into the pumpkin and place it on a cookie sheet. Return it to the oven with the lid on for another 15-30 minutes (make sure the oven shelf is low enough so the stem isn’t touching the burner).
  9. Remove the top after 15 minutes and remove from oven if cauliflower is done or cook another 15 minutes with lid off until done.
  10. Serve hot in the pumpkin

Variations

Butter makes everything better! You could substitute it with ghee as a dairy free option or increase the milk to 1/3 cup from 1/4 cup.

The original recipe calls for bread crumbs or rice. To make this with rice, sub the cauliflower with 2 cups of uncooked rice, use 1/3 cup milk and cook the entire dish inside the pumpkin from the start for 60-90 minutes with lid on.  Remove lid the last 15-30 minutes and cook until rice is done (Directions in link above for original recipe).


Holiday baking season is here!!  My favorite place to order all of my nut flours, nuts, chocolate, dried fruit, etc is www.nuts.com.  They have every kind of nut flour out there that is finely ground and sure to make your grain free baked goods perfect! They are certified gluten free so there is absolutely no cross contamination!!


Baking wouldn't be the same without a sweetener, but I prefer to use a sweetener that won't raise insulin levels, is natural, won't upset your belly and won't leave you feeling guilty!  Swerve is my go to...and you can enjoy 10% off as one of my readers with coupon code KATE10!

Kate's Healthy Cupboard - Gluten Free Recipes
In Side Dishes, Vegetables, Recipes Tags Bacon, Low Carb, Nut-Free, Paleo
1 Comment

Pineapple Coconut Bars with Chocolate Macadamia Nut Crust (Guest Post)

October 24, 2013 Kate
Pineapple-coconut-bars-1

I am so excited to share this guest post by Adriana of Living Healthy With Chocolate!  She is so very talented and has taken one of my favorite foods...chocolate and incorporated it into each and every recipe she creates!  Adriana lives in Hawaii and I think this tropical dessert tells a story of the amazing fresh foods she has access to on the island.  Coconut, chocolate and macadamia nuts are some of my favorites and these bars look delicious!  These are grain free and only sweetened with fruit and just a tiny bit of honey.  Enjoy her story and recipe below and be sure to go check out her blog and follow her on Facebook  and Pinterest to see all of her creations!!!

Pineapple and coconut are two of the most abundant fruits here in Hawaii. As you may know, pineapples are cultivated on an agricultural scale here by Dole Plantation. The farms are right next to my house and as I drive to and from work I can smell the sweet scent in the air. It is lovely! The down side of these farms is that they are heavily sprayed with pesticides and it breaks my heart every time I see the giant machinery spraying the crops. There are some growers in the islands that grow pineapple organically, but the price is over $8 for a very small pineapple, which makes it a rare and special treat for me.

Coconut on the other hand is everywhere. Some fruit stands sell the meat for very cheap, about $3.00 for a full bag. The organic store near my house often sells whole coconuts for just $1.50 each! How lucky am I?! Coconut is my favorite everyday snack and there is plenty of it here :) My husband and I often go to the local green waste drop off area by my house to look for coconuts that the tree trimmers just throw away by the dozens.....sometimes we are able to fill multiple containers with fresh coconut water and then we freeze the fresh meat.

How about the combination of coconut, pineapple, chocolate and macadamia nuts? If you haven't tried the four together you are in for a real treat. In this recipe I tried to mix all of these delicious foods into one irresistible dessert.

This is a very easy to make recipe and the consistency is soft and moist. The chocolate crust is sweetened with a creamy date paste and loaded with macadamia nuts. The top layer is a simple mixture of fresh pineapple and coconut. Depending on how sweet your pineapple is, you can add some raw honey to the mixture. I felt that one tablespoon was sweet enough, but feel free to add more if you would like it to be sweeter. Enjoy!Select this line to insert text description of recipe here

Pineapple Coconut Bars with Chocolate Macadamia Nut Crust

Ingredients

Crust:

  • 1/2 cup almond flour
  • 4 tablespoons raw cacao powder
  • 1/3 cup macadamia nuts
  • 5 medjool dates (about 1/2 cup)
  • 1/2 teaspoon vanilla extract
  • 1 1/2 teaspoons coconut oil, melted

Filling:

  • 2 eggs
  • 1 cup fresh pineapple, chopped
  • 1 1/3 cup shredded coconut, unsweetened
  • 1 tablespoon fresh lime juice
  • 1 tablespoon vanilla extract
  • 1 tablespoon raw honey
  • 1/2 cup almond flour
  • pinch of salt

Instructions

Crust:

  1. 1. in a large bowl, mix the almond flour and cacao powder
  2. 2. chop the macadamia nuts in a food processor and add it to the bowl
  3. 3. remove pits from dates and process it in the food processor until creamy
  4. 4. add the creamed dates, vanilla extract and coconut oil to the dry mixture and using your hands, mix to combine ingredients
  5. 5. spread the mixture evenly on the bottom of an 8×8-inch pan lined with parchment paper

Filing:

  1. 1. in a large bowl beat the 2 eggs
  2. 2. mix in the pineapple, 1 cup of shredded coconut (reserve the remaining 1/3 cup for the top), lime juice, vanilla and honey
  3. 3. gently mix in the almond flour and salt
  4. 4. pour mixture over the crust and sprinkle with remaining shredded coconut
  5. 5. bake at 350°F for about 20 minutes or until the top starts to turn brown and the pineapple/coconut layer is firm
  6. 6. set pan on a wire rack and allow it to cool before cutting into squares. Store in the refrigerator.
Kate's Healthy Cupboard - Gluten Free Recipes
In Recipes, Desserts3 Tags Chocolate, coconut, Paleo
2 Comments

Chocolate Coconut Sport Gummies

October 15, 2013 Kate
Chocolate Coconut Sport Jellies

I was recently listening to my favorite podcast, Ben Greenfield Fitness (one of the best out there, love those guys) and he was talking about fueling for races and made some comment about a high fat gummy for fuel.  It got me thinking that I could create one myself that could be stuffed away in a ziploc for use on a long training day.  You don't have to be an athlete to enjoy these, you can just call this coconut jello and enjoy it as a high fat treat!! I'm sure some of you athletes out there know what Clif Blocks are...gummy blocks full of sugar that are meant to be consumed during a race.  Some people need substance rather than a liquid, so these work great, but it's all sugar!  More and more athletes are turning to a high fat, low carb lifestyle and are doing away with the gels, gu's and other simple sugars as fuel during races and longer training sessions.  The purpose of this is to tap into your bodies fat stores for energy rather than being a sugar burner.  These gummies are a perfect source of fat for quick energy and you get some protein (amino acids) from the gelatin as well!  The triathlon and marathon season is coming to a close, but these would be good for those looking for a convenient way to fuel your workouts or to tie you over between meals.

I am a huge fan of gelatin, I actually use it daily in hot bone broth, soups or just in hot water.  It is beneficial for the gut, joints, skin and much more!!  Wellness Mama has a great post about its benefits and all of the ways to use it.  I recommend Great Lake's Gelatin (Natural Grocer's sells it) or Upgraded Self Collagen from The Bulletproof Exec website.

I also love using MCT oil (Medium-Chained-Triglycerides, also found in coconut oil and are different than Long-chained-triglycerides found in oil olive and other fats). MCT's are absorbed more like carbohydrates and are used and burned quickly by the body and not stored in the fat cells and any extra are converted into ketones.  Sounds like the perfect fat for fueling your long runs, bike rides or whatever activity you choose!  MCT oil is tasteless and stays in liquid form, so it is perfect for salad dressings or to drizzle on any dish for added fat.  You can certainly leave this out of the recipe, but it's what provides the fat along with the coconut milk that will be your fuel!  Don't get crazy and start dumping MCT oil on all your meals right away, it can cause intestinal issues for some people that are not used to large amounts of fat.  I actually didn't have any issues with it and add it to my morning smoothie every day.  I use Dave Asprey's MCT Oil or I'd suggest Now Foods MCT Oil that can be found at some health food stores in the supplement department or from Amazon.

I have not taken these out on a run (I typically don't eat anything), but please let me know if they survive the heat and how they worked for you!!

Chocolate Coconut Gummies

Ingredients

  • 1 can full-fat coconut milk
  • 3 tbsp gelatin (from grass-fed source, see above for sources)
  • 1 tbsp or more MCT oil (optional, see above for sources)
  • 1/4 tsp vanilla bean powder or 1 tsp vanilla extract
  • 2-3 tsp cacao powder (these are also good without, but cacao adds flavor and antioxidants)
  • couple sprinkles of sea salt
  • Stevia or other sweetener to taste (I used a tbsp of Swerve for no sugar option)

Instructions

  1. Place all ingredients in a blender and mix until well combined
  2. Pour into a candy mold or glass dish (size depends on how thick you want the gummies to be) and refrigerate until firm
  3. Cut into desired size and store in the refrigerator

Notes

You can tailor these to your liking by adding more cacao or none at all or try using different extracts or flavorings.

xo,

In Recipes, Desserts3 Tags Chocolate, Coconut Milk, Dairy Free, Gelatin, MCT Oil, Nut-Free
18 Comments

Pumpkin Pecan Cookies

October 9, 2013 Kate
Grain Free Pumpkin Pecan Cookies Recipe

So many people love this time a year when pumpkin seems to show up in every recipe!  I can take it or leave it and would much prefer a chocolate cookie!  For those of you pumpkin lovers, I will admit this cookie recipe turned out pretty darn good!

I wasn't sure what I was going to end of with, but after two tries, I'm satisfied!  The texture is soft and a bit cake like to start, but as they sit, the outer edge gets a bit crisp.  I think they are perfect and the fact that they disappeared in a matter of a day, I think everyone liked them!and and start to clump together.  It's the stage before pecan butter would star

Pumpkin Pecan Cookies

Ingredients

  • 1 1/2 cups pecan pieces
  • 1/2 cup granulated sweetener* (I used Swerve for no sugar option and added 1 tbsp coconut palm sugar)
  • 1/4 cup arrowroot flour
  • 1 1/2 heaping tsp cinnamon
  • 1/2 heaping tsp nutmeg
  • 1/4 heaping tsp ginger
  • 1/4 heaping tsp cloves
  • 1/4 tsp baking soda
  • 1/8 tsp sea salt
  • 1/2 cup pumpkin
  • 1 small egg (I use farm fresh soy free eggs from Tropical Traditions)
  • 3 tbsp grass-fed butter or coconut oil, melted
  • 1 tsp vanilla

Instructions

  1. Place the pecans in a food processor and blend until the nuts resemble coarse sand and start to clump together.  It’s the stage before pecan butter would start
  2. Add in the sweetener, arrowroot, spices, salt and soda. Pulse a couple times until combined
  3. In a large mixing bowl, whisk the egg with the pumpkin, butter and vanilla
  4. Pour the pecan mixture into the wet mixture and combine
  5. Spoon dough out onto a parchment lined cookie sheet. The cookies will spread a bit
  6. Bake at 350 for 12-14 minutes. Place on a cooling rack to cool

Quick notes

I almost made these without the egg and I think they would still work without it. The arrowroot provides some structure and binding. I think the end result may be a harder crunchier cookie which may be what some of you prefer.

Variations

I prefer using my own spices rather than pumpkin pie spice blends from the store. I think it tastes better and allows you to add more off a specific flavor that you prefer. You could certainly use a spice blend, but I would add it in the end so you can keep adding if need be.

*I typically don’t provide a variation unless I try it myself.  I think this would work with maple syrup, honey or coconut nectar.  I would remove the egg (it provides liquid and see my quick notes section above) and use 1/4 cup or less of liquid sweetener.  Add it with the rest of the liquid ingredients.  You can always start with less and ad more if need be!

If anyone tries the no egg variation and/or with a liquid sweetener, let us all know how it turned out! 

If you are an Amazon shopper, would you be so kind to use my affiliate link to make your purchases.  It is at no cost to you, it does provide a tiny kickback to Kate’s Healthy Cupboard.  This allows me to continue making and testing recipes for free.  Thanks so much!!

I have recently switched all of my skincare and makeup to a company that is free of 1,500 chemicals!!  I am so particular about what goes into my body, I need to be just as picky as to what goes on my body!  Your skin is your largest organ and absorbs chemicals into the bloodstream faster than the gut does!  I am vain when it comes to my skin and was so thrilled to find products that are anti-aging and work!!!  Check out my Beautycounter link for more info!!  You will love it!!

Kate's Healthy Cupboard - Gluten Free Recipes
In Recipes, Desserts3 Tags Cookies, Holiday, Pecans, Pumpkin, Swerve
Comment

Flourless Double Chocolate Chip Cookies

September 17, 2013 Kate
Flourless Double Chocolate Cookie Recipe

These rock!!!  So easy, so scrumptious and low sugar when you use Swerve...my favorite natural sugar alternative!  The final product is a dense cookie with a bit of a crunch.  Your chocolate craving and sweet tooth will definitely be cured!

This cookie recipe is perfect for those of you that are nut-free and there's a dairy free option.  This sparked another idea for a flourless cookie recipe...stayed tuned, especially if you aren't a chocolate person!ned cookie sheets, it should spread out some.  I used the spoon to spread to desired size.

Makes 8 large cookies or 12 small cookies

Recipe: Flourless Double Chocolate Chip Cookies

Ingredients

  • 1-2 egg whites (I used 2 pastured eggs from Tropical Traditionswhich can be smaller in size)
  • 1/3 cup cocoa/cacao powder
  • 3/4 cup granulated sweetener ( I used almost all  Confectioner’s Swerve with a bit of coconut palm sugar)*
  • 2 tsp vanilla extract
  • dash of sea salt
  • 1/2 cup dark chocolate chips**

Instructions

  1. Beat whites (start with one) and vanilla for a few seconds until bubbly
  2. Add in cocoa powder, sugar and salt, beat until combined. Batter should be like a thick brownie batter consistency. If it seems too runny, add some more cocoa or sugar. If it seems too thick, add a bit more egg white. You really can’t mess these up!
  3. Fold in the chocolate chips
  4. Spoon batter onto parchment lined cookie sheets, it should spread out some.  I used the spoon to spread to desired size.
  5. Bake at 350 for 12-14 minutes until centers looks done
  6. Let cool on the cookie sheet. Warm cookies will not come off parchment paper cleanly

Variations

*I made these with granulated Swerve and with Confectioner’s Swerveand both tasted great!  The batter will seem gritty if you don’t “powder” your sugar, but the end result will be great!!

**Use Enjoy Life’s Dairy Free Chocolate Chips or Chunks for a Dairy Free option.

If you want to try Swerve or need to order more, use coupon code KATE10 for a 10% discount.  Swerve is my favorite sugar replacement.  It is the only sugar alcohol that will not cause tummy troubles and it does not raise blood glucose levels.

If you are an Amazon shopper, would you be so kind to use my affiliate link to make your purchases.  It is at no cost to you, it does provide a tiny kickback to Kate’s Healthy Cupboard.  This allows me to continue making and testing recipes for free.  Thanks so much!!

*I have recently switched all of my skincare and makeup to a company that is free of 1,500 chemicals!!  I am so particular about what goes into my body, I need to be just as picky as to what goes on my body!  Your skin is your largest organ and absorbs chemicals into the bloodstream faster than the gut does!  I am vain when it comes to my skin and was so thrilled to find products that are anti-aging and work!!!  Check out BeautyCounter for more info!!  You will love it!!

Kate's Healthy Cupboard - Gluten Free Recipes
In Recipes, Desserts3 Tags Chocolate, Cookies, Dairy Free, Flourless, Nut-Free, Swerve
9 Comments

Peach Cookie Bars

September 13, 2013 Kate
Peach Cookie Bars
Peach Cookie Bars

Peach's are still piled high at my local Whole Foods!  Hopefully your local farmer's market or natural grocery store is well stocked too.  I wanted to do something different with peaches and came up with this yummy cookie bar recipe.  I wanted a dense, crispy, but gooey moist bar.  I think I got it!

You could certainly make these more cake-like if you wanted to by adding an egg.  I haven't tried this so I don't know how it would turn out.  I would eliminate the milk to keep it from being soggy.  If anyone tries this, let us all know how it turns out!  I have always been a gooey brownie or bar person, never a cakey brownie person.  I guess that's why I never liked cake...I was the one asking for a corner piece scraping the frosting off to enjoy and leaving the cake behind!

Peach Cookie Bars

Ingredients

  • 2 cups Honeyville Almond Flour*
  • 1/2 cup arrowroot flour
  • 1/4-1/2 cup granulated sweetener ( I used 1/2 cup of mostly Swerveand a bit of coconut palm sugar)
  • 1 peach, peeled and sliced (the more unripe the peach is, the better)
  • 2 tbsp grass-fed butter, softened and cut into pieces
  • 1-2 tbsp non-dairy milk
  • 1 tbsp vanilla extract
  • 1- 1 1/2 tsp cinnamon
  • 1/2 tsp baking soda
  • 1/4 tsp sea salt

Instructions

  1. Line an 8×8 baking dish with parchment paper, this makes it really easy to get the bars out in one piece
  2. Place all of the dry ingredients into a food processor and combine
  3. Add in the butter, vanilla and 1 tbsp of milk and pulse until a dough forms
  4. The dough should form a ball and be wet, Add more milk if needed
  5. Press the dough into the baking dish until fully covered, then place the peach slices on top of the dough
  6. Bake at 350 for 32-35 minutes or until the top is golden
  7. Let cool, remove the bars from the pan by pulling up on the sides of the parchment paper. Cut into desired size bars
  8. Store in an airtight container. These are great at room temp, but as with all almond flour goodies, I think they are best out of the freezer!!! Let them sit for a minute or two out of freezer to thaw the peach.

Quick notes

*I suggest using Honeyville Almond Flour, Bob’s Red Mill does not absorb moisture like the more finely ground flours.

Variations

Softened coconut oil should work in place of the butter for those that are dairy free.


These are even more delicious with Dairy Free Vanilla Bean Ice Cream on top!!  Also if you have been wanting to try Swerve, the confectioner's Swerve is $2 off right now!!  If your order is over $30, shipping is free and you can use coupon code kate10 for an additional 10% off!!!

Kate's Healthy Cupboard - Gluten Free Recipes
In Recipes, Desserts3 Tags Almond flour, Dairy Free, Egg-Free, Swerve, Vegan
Comment

Homemade Creamy Coconut Milk

September 9, 2013 Kate
Homemade Creamy Coconut Milk2

I have tried to like homemade coconut or almond milk, but just can't give up my store bought milks.  They are creamy and seem thicker than homemade versions.  I imagine if you add dates to sweeten your milk, they may make it thicker, but I don't want that much sugar added to my milk.

The ingredient that is responsible for the creaminess in the box varieties is carrageenan or sometimes guar gum.  Carrageenan is from red seaweed that acts is a thickener or emulsifier.  It's what gives many ice creams a good mouth feel.  You'd think that seaweed would be safe or even beneficial, but studies show it may be hard on the gastrointestinal tract.  It may be fine for some of you, but my thought is that if possible, remove it from my diet.  There is more and more talk about the dangers of it, enough to make food manufacturers remove it.  Califia (my favorite brand found in the refrigerate section in a plastic bottle) and So Delicious are in the process of removing carrageenan.  In the meantime, I have found a way to make a creamy homemade version!

Th secret ingredient, kelp noodles!!  Kelp is a brown seaweed full of nutrients!  Some people take kelp for it's iodine content.  Many of you have probably had these noodles in stir fry, as pasta or in a salad.  Most natural grocery stores sell them or you can find them on Amazon, but they are much less expensive at your local store.  They are usually found in the refrigerator section, often times near fermented foods or vegetarian cheeses and tofu (don't be buying any of these).  I rinse the noodles well and store it in an airtight container.  I promise you would never taste or even know the noodles are in the milk!!

Recipe: Homemade Creamy Coconut Milk

Ingredients

  • 1/2 cup kelp noodles (loose, don't pack them)*
  • 1/2 tsp vanilla extract
  • dash of sea salt
  • sweetener (optional, I use liquid stevia or Swerve for no sugar option)

Instructions

  • Blend the coconut and water on high until smooth. Pour through a Nut Milk Bag or cheesecloth into a pitcher, drain all of the liquid out of the bag
  • Pour the mixture back into the blender and add the kelp noodles, vanilla, salt and sweetener. Blend on high until smooth.
  • Store in an airtight container in the refrigerator

Quick notes

*Make sure you rinse and drain the noodles before you use them.

Variations

Add kelp noodles to any homemade nut milk to make it creamier. Increase the amount of noodles if you prefer thicker milk.

Kate's Healthy Cupboard - Gluten Free Recipes
In Beverages, Recipes Tags coconut, Coconut Milk, Dairy Free, Nut-Free, Vegan
4 Comments

Dairy Free White Chocolate Ice Cream

August 27, 2013 Kate
Dairy Free White Chocolate Ice Cream

Labor Day Weekend is here and so is one of my favorite ice cream recipes to date!!!  Remember TCBY's white chocolate mousse frozen yogurt?  It was my favorite!  This ice cream doesn't taste exactly like it, but it's pretty darn good and quite addicting!

White Chocolate is a tough one to recreate since it contains milk powder.  It really isn't even chocolate!  The secret ingredient in this recipe to get it to taste chocolatey, is raw cacao butter.  I'm sure you have all heard of cocoa butter, often times found in body lotions and butters.

"Cacao butter is a stable fat that is pressed out of cacao beans. It has been used for ages as the solid to make white chocolate, as well as other chocolate bars. It holds together at room temperature providing that ideal candy bar crispness. It has a mild chocolate taste and flavor, and carries only trace amounts of the caffeine compared to what's found in chocolate. Cocoa butter is ideal for beauty care products as well since it stays solid at room temperature, has naturally occurring antioxidants which prevent rancidity"

Some health food stores sell Raw Cacao Butter in their raw section or you can order it online (make sure it's food grade cacao butter).  I think www.nuts.com has one of the best prices and ships out quickly so you can make this for your weekend BBQ!!

Dairy Free White Chocolate Ice Cream

Ingredients

  • 2 cans full fat coconut milk
  • 2 pasture raised egg yolks (optional, makes it creamier))
  • 1 cup cacao butter, shaved and melted
  • 1/4-1/2 cup sweetener (I used 1/2 cup Swerve for a sugar free option. If using a liquid sweetener, start with 1/4 cup)*
  • 1 1/2 tbsp vanilla extract
  • 1/4 tsp sea salt

Instructions

  1. Place all of the ingredients into a blender and combine
  2. Pour mixture into an Ice Cream Maker and follow the instructions for the machine. You can also freeze it in a loaf pan if you don’t have an ice cream maker.

Variations

*Using honey or maple syrup is going to give this a bit of a different taste.

Consuming raw eggs is not a concern of mine since I buy farm fresh eggs from Tropical Traditions.  You can certainly leave them out or temper the eggs.


This is my Cuisinart Ice Cream Maker that I love!  If you want to try Swerve, use coupon code KATE10 to enjoy 10% off!

Kate's Healthy Cupboard - Gluten Free Recipes
In Recipes, Desserts3 Tags Chocolate, Coconut Milk, Dairy Free, Ice Cream, Nut-Free, Vegan
5 Comments

Peach Pico De Gallo Over Poached Cod

August 25, 2013 Kate
Peach Pico De Gallo Over Paoched Cod - www.kateshealthycupboard.com

It's peach season!!  I have always seen fresh mango salsa and pico, but I wanted to create fresh peach pico.  This recipe is simple and really just a starting point for you to tailor it to your liking. Some of us like our salsa and pico a bit spicier or love cilantro while others hate cilantro and can hardly handle any jalapeno.

I chose to put the pico over poached fish to share with you how to poach fish for those of you that have no idea how to.  It is my favorite way to eat fish now.  It is simple, clean and doesn't stink up the house! I used black cod (sablefish) in this photo, but would have preferred regular cod.  Black cod provides a high amount of omega-3s similar to wild salmon and cod does provide some as well.  They are both mild fish, cod a bit milder and black cod is buttery like sea bass.   I typically love buttery fish, but think it's best plain.  I think when paired with peach pico, regular cod would be better.  This recipe could be enjoyed over chicken, shrimp, salmon or simple used as a dip.

Peach Pico De Gallo over Poached Cod

Ingredients

  • 2 peaches, peeled and diced
  • 1 small tomato, diced
  • 1/4-1/2 cup red onion, diced
  • 1/2 of jalapeno, seeded and diced
  • juice of a fresh lime
  • cilantro (optional)
  • garlic powder
  • sea salt
  • 46-8oz pieces of cod

Instructions

Salsa: Serves 4

  1. Combine all ingredients in a bowl, sprinkle with garlic and sea salt to taste
  2. Cover and place in the refrigerator

Fish:

  1. Fill a skillet with water high enough to cover fish
  2. Allow water to come to a simmer and place the fish in the water. Depending on the thickness, you may want to slice fish into 3 inch pieces to cook
  3. Poach for about 8-10 minutes while keeping water simmering
  4. Fish should almost fall apart and flake when done
Kate's Healthy Cupboard - Gluten Free Recipes
In Recipes, Entrees2 Tags Dairy Free, Egg-Free, Fish, Nut-Free
Comment

Dairy Free Lemon Mousse

July 30, 2013 Kate
Dairy Free Lemon Mousse Recipe

I'm going to keep this short and sweet...this is the perfect refreshing summer dessert!!  This recipe was adapted from Nourishing Traditions Cookbook to make it dairy free.

Dairy Free Lemon Mousse

Serves: 4

Ingredients

  • 6 eggs
  • 2 tbsp lemon zest (2 lemons)
  • 4 tbsp or more of fresh lemon juice (2 lemons)
  • 1/4 – 1/2 cup liquid or granulated sweetener (I used about 1/2 cupSwerve for sugar free option)
  • 1/2 cup coconut cream*
  • sea salt

Instructions

  1. Place the yolks, sweetener, zest and juice in a double boiler over a pot of boiling water. Whisk about 10 minutes until the mixture thickens
  2. Once it has thickened, place in the frig for about half an hour to cool or the freezer for 10 minutes
  3. Place the egg whites in a bowl with a dash of sea salt and set aside
  4. Place the cream in a bowl and beat it until it is whipped and stiff, set aside
  5. Beat the egg whites with the salt until stiff peaks are formed
  6. Once the yolk mixture has cooled a bit, add it slowly to the cream and combine
  7. Now fold in the egg whites into the yolk and cream mixture
  8. Once mixture is combined, spoon into serving dish and refrigerate to allow the mousse to set up.

Quick notes

*Coconut cream is the thick cream that settles at the top of a can of refrigerated full fat coconut milk

Variations

The lemon zest can be felt in the mouth, so if this texture bothers you, I’d suggest blending the yolk mixture with the cream in a blender. Then, pour mixture into a bowl to then fold in the egg whites. This recipe will work with limes or oranges as well. Amount of zest and juice may vary.


I love using Swerve for making my dessert sugar free.  If you have been wanting to try Swerve, use KATE10 to receive 10% off your order.  Make sure to order $30 worth of product to get free shipping!

Kate's Healthy Cupboard - Gluten Free Recipes
In Recipes, Desserts3 Tags Coconut Milk, Dairy Free, Nut-Free, Paleo, Swerve
3 Comments

Beet Crackers

July 18, 2013 Kate
Beet Crackers
Beet Crackers

Recently Coconut Mama posted a recipe for sweet potato crackers that caught my eye.  I once tried to make sweet potato crackers without any coconut or almond flour and it just didn't work.  I will definitely be trying her cracker recipe and think you should too!  Crackers are something I totally miss, that crunch!

What does that recipe have to do with anything?  It was the inspiration for these beet crackers.  I have beets in the refrigerator that I planned to try using in some baked goods, but decided to use them for a cracker recipe instead.  The difference here is that there is not much starch in beets, so I had to add some.  I chose to use arrowroot, the starch from a tuber vegetable and my favorite starch to cook with.  It can be found in the flour section of any natural grocery store.  Bob's Red Mill sells it and it's a reasonably priced flour/powder.

I kept these crackers super simple and just used salt to season them.  I also topped them with my amazing black sea salt that adds so much flavor.  I think the variations are endless and next time I may try a bit of balsamic vinegar and basil or cumin with the salt.  Goat cheese seems to be great to pair beets with, try some atop these crackers!!

Recipe: Beet Crackers

Ingredients

  • 1 cup raw beets, diced
  • 2 egg whites*
  • 3 tbsp coconut flour
  • 3 tbsp arrowroot powder
  • 1 tbsp coconut oil**
  • 1/2 tsp sea salt and any other spices you desire
  • Sea salt to sprinkle on top

Instructions

  1. In a food processor, process the beets until they are pureed or close to it
  2. Add in the remaining ingredients and pulse until combined
  3. Pour mixture into a pile onto a piece of parchment paper and place an additional piece of parchment over the top
  4. Roll out the “dough” until about 1/8 inch thick or more for thicker crackers
  5. Sprinkle the top with kosher salt or other salt of choice
  6. Bake at 350 for 40-50 minutes
  7. As crackers harden, use a knife or pizza cutter to score the crackers into the desired size
  8. Thinner pieces will be done faster, remove those and continue to cook the rest. You can turn off the oven and let the crackers sit in it until they become completely crunchy

Quick notes

*I always have extra egg whites since I use so many yolks making my ice cream every night (no joke!), but it may work to use the entire egg.  Yolks make things more tender so you may only need one full egg if you do use the yolk.

**Any oil or grass-fed butter will work here. I used expeller press coconut oil to avoid coconut flavor. Olive oil would be good along with macadamia nut or walnut oil.

I loved how these turned out!  My only complaint is that I didn't double the recipe!!!

Kate's Healthy Cupboard - Gluten Free Recipes
In Recipes, Snacks and Appetizers3 Tags Coconut Flour, Crackers, Nut-Free, Paleo
1 Comment

Lemon Blueberry Breakfast Bars

July 2, 2013 Kate
Lemon Blueberry Breakfast Cake Recipe

So typically decadent bars are not something I eat for breakfast, but it seems like the perfect name for this recipe.  This lemony piece of deliciousness is actually the perfect refreshing treat anytime!

I chose to drizzle it with a lemon glaze to add some extra flavor, but it's not necessary.  This would also be good with any berry or a mix of berries.  You could do blueberries and strawberries and make it a 4th of July treat for your BBQ this holiday weekend!!!

The recipe calls for granulated sweetener and a powdered sweetener for the icing. I used my favorite natural sugar alternative Swerve and it's on sale until July 7th!!!  I use Swerve in all of my baked goods and ice cream recipes, it's the perfect healthy substitute and with a buy 2 get 1 free sale, it's time to stock up!!  And, it's free shipping when you spend over $30 and it's unlimited packages (so for every 2 packs you buy, you get a bag free)!  For this recipe I'd order at least 2 bags of the granulated so you get the free bag and one of the confectioners (powdered) or you can simply run the granulated thru a spice grinder or blender to powder it.  That way you qualify for free shipping!

 Lemon Blueberry Breakfast Bars

Ingredients

  • 1/2 cup coconut flour
  • 1/4 cup almond flour
  • 3 pastured eggs (I order from Tropical Traditions)
  • 3/4 cup full fat coconut milk
  • 1/3-1/2 cup granulated sweetener (I used Swerve for sugar free option)
  • 1 1/2 tbsp fresh lemon juice
  • 1 tbsp lemon zest
  • 1/2 tsp baking soda
  • 1/4 tsp sea salt
  • 1/2 cup fresh organic blueberries* (or more if you prefer)

Icing:

  • 3/4 cup powdered sweetener (I used confectioner Swerve for no sugar option.  You will need to run granulated sugar through a spice grinder or blender to prevent grainy icing)
  • 4-5 tbsp fresh lemon juice
  • 1/8 cup non-dairy milk (I used So Delicious unsweetened vanilla coconut milk)

Instructions

  1. Combine the flour, sugar, salt and soda in a bowl and set aside
  2. Beat the eggs, coconut milk and lemon juice in a large bowl
  3. Combine the flour with the wet ingredients and the zest and mix until all of the clumps are out
  4. Fold in the blueberries
  5. Pour batter into a 8×8 greased dish
  6. Bake at 350 for about 30 minutes

For the icing:

  1. Place all of the ingredients in a blender and combine
  2. Drizzle over the bars once they have cooled.

Variations

*Any berry or combination of berries would work in here. I would cut any berry besides blueberries into smaller pieces.


For some reason, baked goods that use coconut flour tend to taste better cold.  I suggest storing this in the refrigerator until you serve it or if you happen to have any left over!!

Kate's Healthy Cupboard - Gluten Free Recipes
In Breads and Muffins, Recipes, Breakfasts2, Desserts3 Tags Almond flour, Breakfast, Brunch, Coconut Flour, Coconut Milk, Paleo, Swerve
9 Comments

Cardamom Carrot Pudding

June 20, 2013 Kate
Cardamom-Carrot-Pudding_Copy_2

I am so excited to share this guest post with you!  This delicious pudding recipe was created by Abby from the Yes to Yummy Blog.  Abby is a 15 year old girl (yes, just a teenager) that decided to take her health into her own hands...literally!  She went from being a bit overweight to a bit compulsive with her eating.  She was tired of her calorie restrictive diet and eating chicken breasts everyday.  This led her down the Paleo road and to renewed health from eating grain free and enjoying high amounts of healthy fats.  She took an interest in healthy cooking and enjoys sharing her recipes with others.  I know I can learn a thing or two from her.  She visits a butcher regularly and is far more versed in meats than myself!  Check out her recipes ranging from lamb kebabs, pork carnitas, duck breasts to parsnip hash, arugula pesto and cauliflower couscous!!  She has numerous other sweet treats as well and today she is sharing one of them with us!

Below is a small blurb about her journey and her mission.  You can read more about her and her story on the blog.

I've always loved food, although not always of the healthiest sort. After being a little overweight for years, I decided to experiment with cooking nutritiously in an attempt to improve my eating habits. I wound up losing some weight, but more importantly, I felt so much healthier as a whole. Now, I want to show people that conscious eating can be exciting, creative, and above all delicious with my recipes. If a teenager can live happily and healthfully without eating processed food, I think anyone can.

Summer is finally upon us, and I couldn't be happier. I love stepping outside and feeling the sun on my arms, then being wrapped in a blanket of perfect warmth. Sure, only about 20% of summer days are actually like that where I live, but a girl can idealize.

When the weather heats up, the last thing you want is a big, heavy breakfast. Unfortunately, eggs don't often qualify as light, cool, and refreshing. They get pretty boring after a while, too, and aren't the best choice for those with autoimmune conditions or problems with inflammation.

This breakfast pudding is the solution to all of your problems. It's gluten-free, grain-free, casein-free, nut-free, and paleo, and can easily be made completely dairy-free and vegan. It's simple to prepare and is mostly hands-off. You can whip up a big batch on the weekend and have a healthy, delicious breakfast available all week long.

First, grate three large carrots in the food processor or with a box grater. I'm lazy; I used my food processor.

Grated-Carrots_Copy
Grated-Carrots_Copy

Heat 1 1/2 tablespoons of ghee or coconut oil (for dairy-free and vegan) in a large non-stick skillet over medium heat. When hot, add the carrots, and saute for 5 minutes, stirring frequently. Afterwards, cover with a lid, reduce the heat to low, and cook until soft and beginning to brown, about 30 to 35 minutes more. Give it a shake or stir every 5 minutes or so to prevent burning.

Once the carrots are done, add them to a blender or food processor with 1 14-ounce can of full-fat coconut milk, 2 teaspoons of ground cardamom, 1 tablespoon of ground cinnamon, 1 tablespoon of vanilla extract, and 1/4 teaspoon of liquid stevia OR 1-2 tablespoons of honey or maple syrup. Blend until completely liquefied, about 2 to 3 minutes.

Chia-Seeds_copy
Chia-Seeds_copy

Pour the carrot and coconut mixture into a large container, and stir in 3 tablespoons of chia seeds. You can ground them if you want, but I like leaving them whole.

Put the pudding container in the fridge, and wait at least 4 hours (preferably overnight) before eating. Garnish with raisins, a little more cinnamon and/or cardamom, and a dollop of coconut cream, if you like.

So, why chia seeds? Well, they're high in omega-3 fatty acids, are excellent sources of manganese, calcium, phosphorus, and magnesium, and have a boatload of digestible fiber. They're everywhere these days--I've even seen them at Stop and Shop--but if you can't find them, you can always order some off of Amazon for a fairly low price.

Cardamom-Carrot-Pudding_Copy

It's as easy as that to have a sweet, nutritionally-sound breakfast. So, what are you waiting for

Cardamom Carrot Pudding

Ingredients

  • 3 large carrots, shredded
  • 1 1/2 tablespoons of ghee OR coconut oil
  • 1 14-ounce can of full-fat coconut milk
  • 2 teaspoons of ground cardamom, plus additional for garnish
  • 1 tablespoon of ground cinnamon, plus additional for garnish
  • 1/4 teaspoon of liquid stevia OR 1-2 tablespoons of honey OR maple syrup
  • 3 tablespoons of chia seeds, whole or ground*
  • Unsweetened raisins, for garnish (optional)

You can also find Abby on Facebook, go like her page so you don't miss any of her recipes!!!

Kate's Healthy Cupboard - Gluten Free Recipes
In Breakfasts, Recipes, Desserts3
4 Comments

Coconut "Rice"

June 4, 2013 Kate
Coconut Cauliflower Rice

Summer is here....hence why I have been absent in the kitchen lately.  I am trying to get outside more and get off of the computer.  Don't worry, I still have lots of recipes in the pipeline!

This recipe is inspired by a recipe from The Joy of Cooking, one of my favorite cookbooks.  The original recipe was made with jasmine rice, but I chose to make it with cauliflower "rice" and loooooved how it turned out.  I could have eaten the entire head of cauliflower!

Coconut “Rice”

Ingredients

  • 1 cup full fat coconut milk
  • 1/2 cup water
  • 1 large head of cauliflower, trimmed and washed
  • 2 slices of fresh ginger, peeled (about inch in size)
  • 1/2 tsp sea salt
  • 1-2 tbsp toasted unsweetened coconut shreds (optional)

Instructions

  1. Place raw cauliflower in a food processor and pulse until rice size pieces are formed
  2. Using a Nut Milk Bag or kitchen towel, drain the excess water out of the cauliflower, set aside
  3. In a saucepan, combine the coconut milk, water and ginger and bring to a boil
  4. Add the cauliflower and simmer for 30 minutes uncovered
  5. Remove from heat and discard the pieces of ginger, add in the salt. Do not add it beforehand, it pulls water out vegetables.
  6. Serve with the toasted coconut sprinkled over top

This could easily be sweetened with something like Swerve and reduce the amount of salt to make it a sweet treat.  Another idea is to add protein powder of choice and eat it like a hot breakfast cereal (maybe even add some grass-fed butter).  You could also do something similar to my Pumpkin Spice Cream Of "Wheat Recipe and add in eggs.

Kate's Healthy Cupboard - Gluten Free Recipes
In Side Dishes, Vegetables, Recipes Tags Coconut Milk, Egg-Free, Low Carb, Nut-Free, Paleo, Vegan
1 Comment

Cinnamon Ice Cream

May 20, 2013 Kate
Dairy Free Cinnamon Ice Cream Recipe

It's finally warming up around here and my ice cream maker is running non stop!!!  I absolutely love making homemade ice cream, it's my go to sweet treat!  I actually use my Cuisinart Ice Cream Maker throughout the winter and love how easy it is to use.

I have been on a serious cinnamon kick!!  I have really good cinnamon that I use often in treats I don't mention on here...like sprinkling it on shredded coconut to enjoy.  Cinnamon is a spice you definitely want to include in your diet, it is full of benefits.  It is a great blood sugar stabilizer and source of anti-oxidants.  There are many different types of cinnamon out there and you probably thought taste was the only difference...well think again and check out what kind of cinnamon you are buying.  Both Ceylon and Cassia have health benefits, but if you are consuming quite a bit of it, you might want to consider buying Ceylon cinnamon!

Ceylon and cassia cinnamon are the most common commercially produced cinnamon varieties. Ceylon cinnamon is often called "true" cinnamon and comes primarily from Sri Lanka. Cassia is also called Saigon or Chinese cinnamon after the country that commonly produces this spice. Both varieties of cinnamon have similar health benefits and nutritional content. However, since cassia contains a higher level of coumarin, which may cause liver damage in high quantities, some health officials recommend Ceylon cinnamon as a healthier alternative.

Time for the recipe already!!  I made this ice cream dairy free, but added melted grass-fed butter.  You can omit the butter to make it dairy free, but the butter does add some extra yumminess!  I actually clarify my butter to remove the milk solids so I can still get all of the benefits of butter!  This just might be my favorite ice cream recipe yet.  My mom said it would be good over a sopapilla...guess I better work on a grain free sopapilla recipe!

Cinnamon Ice Cream

Ingredients

  • 2 cans full fat coconut milk
  • 2 egg yolks*
  • 1/4-1/2 cup sweetener (I used Swerve for no sugar option)
  • 2 tbsp grass-fed butter, melted (optional, but highly recommended, it makes this recipe!)
  • 2-3 tsp cinnamon
  • 1 tsp vanilla extract
  • 1/8 tsp sea salt

Instructions

  1. Add all ingredients to a blender and blend until smooth
  2. Pour mixture into Cuisinart Ice Cream Maker and follow the directions for the machine. If you don’t have an ice cream maker, this can be poured into a bread pan, cover and freeze (it just wont have that churned texture).  The bread pan makes it easy to use an ice cream scoop to serve.
  3. Once ice cream is frozen, remove from the maker or the freezer and serve. If you used Swerve, it will harden the ice cream so you may need to let it sit out for a few minutes.

Quick notes

*I use farm fresh pastured eggs from Tropical Traditions so eating them raw is safe. If you don’t feel comfortable doing that, read the directions for my pumpkin ice cream for an alternative option of “cooking’ the yolks.  Make sure to refrigerate the mixture before pouring it into the ice cream maker since it will be warm.

I have quite a few dairy free ice cream recipes on my site that you are sure to love!!!

Kate's Healthy Cupboard - Gluten Free Recipes
In Recipes, Desserts3 Tags Coconut Milk, Dairy Free, Ice Cream, Nut-Free, Swerve
8 Comments

Vanilla Bean Macaroons (Egg-Free)

April 29, 2013 Kate
Vanilla Macaroons
Vanilla Macaroons

If you are a coconut person, these bite size treats are the perfect remedy for your sweet tooth.  Most macaroon recipes are made with egg whites and can have a bit of a spongy or eggy texture that I can do without.  I decided to try a different binding agent and make these egg-less.

The secret ingredient, gelatin!  Gelatin can act like a binder (since it gels) in gluten free products and I plan to experiment with this more.  I use Great Lakes Gelatin that is sourced from grass-fed cows (Now Foods is also a great brand of gelatin).  An added bonus is all of the health benefits gelatin provides, this is a big component of bone broth.  Not only is it great for skin, hair and nails, but it is great for your gut and joints.  I actually add a spoonful of this to my cup of broth everyday!  It is flavorless and you will never know it's in these cookies!

Vanilla Macaroons

Ingredients

  • 2 cups unsweetened coconut
  • 1/4 cup virgin coconut oil, melted
  • 2 tbsp full fat coconut milk cream (cream at top of refrigerated can)
  • 1/4 – 1/2 cup granulated sweetener*
  • 3/4 tsp gelatin
  • 1/4 tsp vanilla beans (1-2 beans)
  • 1/8 tsp sea salt

Instructions

  1. Combine all ingredients in a food processor and blend until a dough forms
  2. With a small cookie scoop, form macaroons and place on a parchment lined cookie sheet. You could also roll into balls and slightly press them down on cookie sheet
  3. Bake at 350 for about 8 minutes or until very slightly brown
  4. Let cookies cool to set up, they will fall apart when warm
  5. These can be stored at room temperature or for a harder cookie, store in the refrigerator

Quick notes

*I used Swerve (erythritol) for a low sugar option along with 2 tsp coconut palm sugar. I have not tried this with a liquid sweetener. You would need to reduce the amount to 1/4 cup or less and it may make the dough too runny. If that happens, just add more coconut until the dough is thick enough to form.

These could also be done in a food dehydrator and would turn out just as yummy!!

Kate's Healthy Cupboard - Gluten Free Recipes
In Recipes, Desserts3 Tags coconut, Coconut Milk, Egg-Free, Gelatin, Nut-Free, Paleo, Swerve, Vegan
1 Comment

Balsamic Roasted Asparagus

April 23, 2013 Kate
Basalmic Roasted Asparagus

Happy Earth Day!!!  Asparagus is in season and on sale!!!  I love asparagus simply roasted or sauteed with sea salt.  The one downfall...why does it have to make your pee smell immediately?? Did you know you either have the gene or not that allows you the pleasure ofsmelling it?  I thought the gene determined if the pee actually smelled, but apparently everyone's smells.  Who knew?

Enough about that!!!  Here is a little twist on roasting asparagus if you're looking for a new way to fix it!  I made this about 6 months ago and am just getting around to posting it...I like creating and posting baked goods so much more!

Basalmic Roasted Asparagus

Ingredients

  • 1 bunch asparagus, trimmed
  • 1 tablespoon oil (melted coconut oil, olive oil or toasted sesame oil for a bit of spice)
  • 2 tsp toasted sesame seeds
  • 1 tbsp balsamic vinegar
  • 1 tbsp coconut aminos
  • sprinkle of crushed red pepper flakes

Instructions

  1. Spread oil onto a parchment lined cookie sheet and roll the asparagus in the oil
  2. Place the asparagus in a single layer and sprinkle the sesame seeds over them
  3. Roast in the oven at 425 for about 10 minutes, check frequently to make sure it’s not getting over cooked and too tender
  4. While that is roasting, combine the vinegar, coconut aminos and red pepper flakes in a small bowl
  5. Remove asparagus and drizzle it with mixture and serve
bundle
bundle
Kate's Healthy Cupboard - Gluten Free Recipes
In Vegetables, Recipes Tags Paleo, Primal, Vegan, Vegetables
1 Comment

Chocolate Hazelnut Butter

April 10, 2013 Kate
Chocolate Hazelnut Butter Recipe

I have to admit, I don't think I have ever had Nutella!  It is full of ingredients that I wouldn't want in my body.  I have definitely had Justin's Nut Butter Hazelnut Spread, but it's certainly not cheap...especially when you can finish off a jar in a couple days!!!  So, I created my own version of it and used Swerve to keep the amount of sugar down.

Chocolate Hazelnut Butter

Ingredients

  • 2 cups hazelnuts
  • 1/2 cup dark chocolate chips or chunks
  • 1/2 cup granulated sweetener, powdered* (I used confectioner’sSwerve for low sugar option)
  • 2 squares 100% cacao bar or unsweetened chocolate
  • 1 tbsp coconut oil (I used expellor press from Tropical Traditions so it didn’t have coconut tones)
  • 1/2 tsp vanilla
  • 1/2 tsp sea salt

Directions

  1. Place the hazelnuts on a cookie sheet in a single layer
  2. Roast the nuts at 350 for 15 minutes
  3. While nuts are roasting, using a double broiler, melt the chocolate chips, squares and oil
  4. When nuts are done, place them between paper towels or dish towels and rub to remove skins.  This takes a little bit of work, but they do not need to be perfectly clean!
  5. Place the nuts, melted chocolate, sweetener, vanilla and sea salt in a food processor or blender and process until smooth
  6. Place the nut butter in an airtight container.  Store in the frig for a harder spread or at room temperature for a runnier spread

Quick notes

*Run sweetener of choice thru a blender or coffee grinder to powder it. If you skip this step it will make the butter gritty. I think a liquid sweetener would work fine here, but add a different flavor profile and I would start with less than 1/2 a cup.

Variations

You can use any nut or combination of nuts, but I would roast the nuts to give it more flavor.


I stored this in the frig and ate it with a spoon...and it didn't last very long!!!

Kate's Healthy Cupboard - Gluten Free Recipes
In Dips and Spreads, Recipes, Desserts3 Tags Chocolate, Hazelnuts, Paleo, Swerve
4 Comments

Grain Free Lemon Bars

March 26, 2013 Kate
Grain Free Lemon Bars Recipe

Spring is here and it's time for refreshing and fruity desserts...don't worry, I will still include some chocolate! Lemon Bars have been on my never ending list of goodies to try to recreate.  We had a family dinner this past weekend and lemon bars were the birthday girl's favorite dessert, so the time had come!!  Let me add that she is not grain free and absolutely loved these and said they taste like the real thing.  The best part is that I used Swerve, (my favorite natural sugar alternative) so they were very low sugar as well!!!

Grain Free Lemon Bars

Ingredients

Crust:

  • 1 1/2 cups Honeyville almond flour
  • 1/2 cup granulated sweetener (I used Swerve to make it a no sugar treat)
  • 1/2 cup grass-fed butter, softened* (let sit out for a few hours until mushy)
  • 1/4 tsp sea salt

Filling:

  • 3 pastured eggs
  • 1/2 cup granulated sweetener (I used Swerve)
  • 4 tbsp lemon juice (2 small lemons)
  • 1 1/2 tsp lemon zest (1 lemon)
  • 1/2 tsp baking powder

Instructions

Crust:

  1. Combine all of the ingredients in a food processor and pulse until combined. A mixer should work as well.
  2. Press the dough into a greased 8×8 baking dish
  3. Bake at 350 for 15-20 minutes until slightly golden
  4. Remove from heat and let cool quite a bit to set up.

Filling:

  1. Heat the oven back to 350 and make sure it’s ready before you start mixing the ingredients. The baking powder will be affected if you wait to bake these.
  2. Place all ingredients EXCEPT the baking powder in a food processor and combine. A mixer will work, but lemon zest will not be ground down and unnoticeable in bars.
  3. Add in the baking powder and pulse one last time
  4. Pour the filling over the crust and bake at 350 for about 25 minutes until crust is set. It shouldn’t get brown, it will feel stiff to touch.
  5. Sift powdered sweetener over the top.  This is optional and I don’t feel these need it.  I used confectioner Swerve on a few bars only for photo purposes.
  6. Store in the refrigerator until serving.  I prefer these chilled!

Variations:

*Coconut oil that is softened should work fine as a substitution to the butter.  I would use expellor pressed so there is no coconut tones!  I love Tropical Traditions Oil!

Not a lemon person?  Substitute the lemon juice and zest for lime.


Have you been wanting to try Swerve?  It is making its way to Whole FoodsStores, but you can order online and use coupon code KATE10 for a 10% discount!!

Kate's Healthy Cupboard - Gluten Free Recipes
In Recipes, Desserts3 Tags Dairy Free, Paleo, Primal, Swerve
Comment
← Newer Posts Older Posts →
download.jpeg

Welcome to Kate's Healthy Cupboard! A place for healthy, grain free recipes, some low carb recipes, safe beauty and products for the home  and more...


>>  CONNECT WITH KATE  <<

pinterest.png
facebook.png
instagram.png

>>  SUBSCRIBE  <<

Success! Now check your email to confirm your subscription.

There was an error submitting your subscription. Please try again.


>>  SEARCH RECIPES  <<


Copyright 2016 Kate's Healthy Cupboard  ||  Website Design