• Blog
  • Recipes
  • Lifestyle
  • Safer Skincare
  • About
  • Contact
Menu

Kate's Healthy Cupboard

Street Address
City, State, Zip
Phone Number
Healthy Lifestyle, Healthy Grain Free Recipes

Your Custom Text Here

Kate's Healthy Cupboard

  • Blog
  • Recipes
  • Lifestyle
  • Safer Skincare
  • About
  • Contact

Grain-Free Ginger Cookies

September 10, 2012 Kate
Grain Free Ginger Cookies

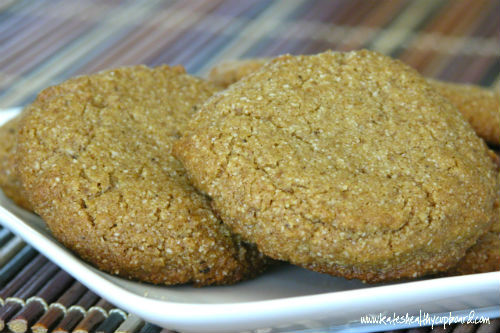
Earlier this year I posted this Gingersnap Cookie Recipe, and today I bring you another one!  Both of these cookies are delicious, but very different.  The original gingersnap cookies are made with almond flour and are soft and chewy like a molasses cookie.  Today's gingersnap recipe is crunchy, spicy and made from chestnut flour.

What is chestnut flour??!  Chestnut flour is a gluten free alternative to regular flour made from ground chestnuts.  Chestnuts have been dried and made into sweet flavored flour in Italy for centuries. In Tuscany, chestnut flour is considered a staple food, and it is commonly called for in recipes such as:  chestnut flour bread, pie crust, crepes, and other baked goods.  Its sweet flavor makes it the perfect fit for recipes involving almonds, chocolate, honey and hazelnuts. I have found it to be awesome in fall recipes that incorporate pumpkin and spice.  Chestnuts do not contain the fat content regular nuts have, and are instead largely composed of carbohydrates.  Chestnut flour does have less carbohydrates than regular white flour but has many of the same baking properties as flour.  I love using almond flour and am not afraid of fat by any means.  I am just enjoying how much fun this flour is to work with, and not to mention how good it is!

Is it actually a nut or a fruit?  According to Wikipedia, it's a fruit.  If you have tree nut allergies, please look into this more, but my understanding is that it's not a nut!!!

Convinced to buy some chestnut flour yet?  You should be because I have a few recipes coming that will use this flour.  It's worth buying a pound or two and seeing what you think!  It can be purchased from Nuts.com and while you are there, they have fine ground almond flour too if you need more.  It's comparable to Honeyville and they also sell other nut flours that could be fun to use instead of almond flour.  I have cashew flour on my list to buy soon to make this awesome Spicy Rosemary Cashew Crackers Recipe!

 Recipe: Grain-Free Ginger Cookies

Ingredients

  • 1 3/4 cup chestnut flour
  • 1/2 cup grass-fed butter or coconut oil, melted
  • 1/4 cup molasses or yacon syrup
  • 3/4 cup granulated sweetener*
  • 1 egg
  • 1/2 tsp vanilla
  • 1/2 tsp soda
  • 1/2 tsp sea salt
  • 1 1/2 tsp cinnamon
  • 3 tsp ground ginger (heaping if you like spicy)
  • 1 1/2 tsp ground cloves
  • 1/2 tsp nutmeg

Instructions

  1. With a handheld mixer, combine the butter/oil, egg, vanilla, sugar and molasses
  2. In another mixing bowl, combine the flour, soda, salt and spices
  3. Combine the two bowls and mix well.  the dough will be thick
  4. Take about 1/3 of the dough and roll it out between 2 pieces of parchment paper to about 1/8-1/4 inch thick
  5. Cut out cookies with a biscuit cutter or round cookie cutter. You could also roll dough into balls and press down flat with the bottom of a greased glass
  6. Place the cookies on a parchment lined cookie sheet and bake at 350 for about 7 minutes
  7. Remove from the oven and place cookies on a wire cooling rack to help them get hard and crunchy
  8. Repeat until the dough is gone

Quick notes

*I used half erythritol and half coconut palm sugar for the sweetener

This makes about 48 thin cookies.  Sounds like a lot, but they will go fast!!  They are so thin that I justified eating 4 at a time thinking it really was equivalent to just 1 regular cookie!

Kate's Healthy Cupboard - Gluten Free Recipes
In Recipes, Desserts2 Tags Chestnut Flour, Cookies, Dairy Free, Nut-Free, Swerve
4 Comments

Dairy Free Pumpkin Ice Cream

September 6, 2012 Kate
Dairy Free Pumpkin Ice Cream

I thought this was the perfect recipe for this time of year as we say good-bye to summer and hello to fall!  I will just forewarn you all that the pumpkin flood gates have opened!!!  It's that ime of year you start to see everything pumpkin on Pinterest and Facebook from food bloggers and I will be contributing to that.  I am sorry if you are not a pumpkin fan, but I will also be working on some apple cinnamon treats as well.

I have told you guys before how much I love my Cuisinart Ice Cream Maker.  It gets used all of the time since this is my go to dessert.  I know many people make ice cream without an actual ice cream maker, but I think it makes a pretty significant difference.  They are reasonably priced and I promise you will become addicted to it as well!!  In the meantime, I would just freeze this in a bread pan to make it easy to scoop out.  Another idea is to make smoothies with this.  I would still freeze it so it becomes your "ice cubes" then add some of it to a blender with some non-dairy milk and a vanilla protein powder!  Yum!!!!

Dairy Free Pumpkin Ice Cream

Ingredients

  • 2 cans full fat coconut milk
  • 4 egg yolks from pastured eggs
  • 1 1/2 cups pumpkin, fresh or canned
  • 1/2 – 3/4 cups sweetener*
  • 2 tsp vanilla extract
  • 1 1/2 tsp cinnamon
  • 1 1/2 tsp nutmeg
  • 1 1/2 tsp ginger
  • 1 tsp cloves
  • 1/4 tsp sea salt
  • 1 tbsp bourbon or vodka (optional, keeps it from getting rock hard)

Instructions

  1. Whisk the egg yolks, any liquid sweetener, vanilla, all spices and salt in a bowl and set aside
  2. Place the coconut milk and any granulated sweetener in a saucepan and bring to a simmer, do not let it boil!
  3. Remove from heat and slowly add the milk a ladle full at a time to the egg yolk mixture, whisking as you go. If the milk is too hot it will cook the eggs*
  4. Once it is all incorporated, transfer mixture to a blender and add in the pumpkin and blend until smooth
  5. Pour mixture back into the bowl and place in the freezer for an hour to cool
  6. Pour the mixture into an ice cream maker and follow the instructions or pour into a bread pan and freeze

Quick notes

*I used a combination of Xylitol Maple Syrup and erythritol to keep the sugar low. These are both not as sweet as regular syrup so add a little sweetener at a time until it’s to your liking

*I buy eggs straight from a farm with pasture raised chickens and feel comfortable eating the yolks raw. I skip the heating the milk part and just throw everything in the blender from the start, then into the ice cream maker.  I keep cans of coconut milk in the frig at all times to it’s already cold and ready to go!!

Variations

I did all of the spices as heaping measurements because I like the spice. You could certainly just use pumpkin pie spice as well.

Kate's Healthy Cupboard - Gluten Free Recipes
In Recipes, Desserts2 Tags Coconut Milk, Dairy Free, Holiday, Ice Cream, Paleo, Primal, Pumpkin
5 Comments

Dairy Free Lime Sherbet Popsicles

August 8, 2012 Kate
Dairy Free Lime Sherbet

First full week of August already....how did that happen!!  I feel like summer will be coming to an end in no time and I better get this recipe out before it's too cool for these treats!  If you like the taste of sour limes, these are for you!!  Get ready to pucker up!!!

I made these so long ago that I forgot about my hot pink popsicle sticks!  I have stainless steel molds and wooden sticks now, thank goodness.  This picture would look so much better with wood sticks, oh well!

Recipe: Dairy Free Lime Sherbet Popsicles

Ingredients

  • 1/4 - 1/2 cup sweetener (I used 1/2 cup erythritol)
  • 1 can full fat coconut milk
  • 1/8 tsp sea salt

Instructions

  1. Combine the zest with all the remaining ingredients in a blender and blend until zest is in tiny pieces
  2. Pour into molds and freeze (makes 4-6)
  3. You could make this into sherbet by using an ice cream machine instead of popsicles

An option would be to add some berries to the mixture after it has been blended.  I think strawberries, raspberries or cherries would be awesome with the lime!

Kate's Healthy Cupboard - Gluten Free Recipes
In Recipes, Desserts2 Tags Coconut Milk, Ice Cream, Paleo, Primal, Vegan
Comment

Chocolate Chip Cookies

July 27, 2012 Kate
Egg Free Chocolate Chip Cookies

As the Olympics begin today,  I wish I had thought ahead and come up with some All-America treat.  Well, that didn't happen, but chocolate chip cookies are the next best thing I could think of!

These are not your typical Toll House Cookies, for many reasons beyond the fact that they are grain free.  I have been experimenting with using coconut milk as my fat in many recipes and am thrilled with the results.  There is a time and a place when baked goods should be moist and melt in your mouth.  These are truly soft batch cookies!

I took my White Chocolate Macadamia Nut Cookie Recipe and altered it a bit.  Instead of using palm shortening as my fat, I used the cream off of full fat coconut milk.  Shortening helps hold cookies together, instead of spreading like butter and oil can do.  I wanted the outcome to be soft and a bit thick...no crunch allowed!  When shortening is used, eggs do not need to be used as a binder, so this recipe is egg-free as well for anyone that is sensitive to them.  If you are a crisp, hard, crunchy cookie lover, this is not the cookie for you!

Recipe: Chocolate Chip Cookies
Ingredients
  • 2 1/2 cups Honeyville Almond Flour (Bob's may not absorb the moisture enough)
  • 1/3 cup cream from full fat coconut milk*
  • 1/4 cup honey*
  • 1 tbsp vanilla extract
  • 1/2 tsp baking soda
  • 1/4 tsp celtic sea salt
  • 1/2 cup dark chocolate chips
Instructions
  1. Cream the coconut milk cream, honey and vanilla in a bowl with a mixer
  2. Combine the almond flour, salt and soda in a larger bowl
  3. Add the cream mixture to the flour mixture and beat until combined
  4. Stir in the chocolate chips
  5. Using a cookie scoop, place batter on a parchment lined baking sheet
  6. Use your hand and press down each cookie
  7. Bake at 325 for about 15 minutes or until a bit brown
Quick notes

*Place a can of full fat coconut milk in the frig overnight. The cream will harden at the top of the can. this is what you want to use, not the liquid. Save the liquid and leftover cream for smoothies!

*I used Xylitol honey that is less sweet than regular honey. I added a bit more than 1/4 cup so I added one additional tablespoon of almond flour.

GO TEAM USA!!!

If you are an Amazon shopper, would you be so kind to use my affiliate link to make your purchases.  It is at no cost to you, it does provide a tiny kickback to Kate’s Healthy Cupboard.  This allows me to continue making and testing recipes for free.  Thanks so much!!

*I have recently switched all of my skincare and makeup to a company that is free of 1,500 chemicals!!  I am so particular about what goes into my body, I need to be just as picky as to what goes on my body!  Your skin is your largest organ and absorbs chemicals into the bloodstream faster than the gut does!  I am vain when it comes to my skin and was so thrilled to find products that are anti-aging and work!!!  Check out BeautyCounter for more info!!  You will love it!!

Kate's Healthy Cupboard - Gluten Free Recipes
In Desserts2 Tags Chocolate, Coconut Milk, Cookies, Egg-Free, Paleo, Primal
1 Comment

Dairy Free Roasted Peach Ice Cream

July 17, 2012 Kate
Roasted Peach Ice Cream

It's peach season!  For those of you that frequent your local farmer's markets, peaches are aplenty!  Here in Colorado we are lucky to have access to Pallisade Peaches from Pallisade, CO, but this recipe will be delicious with any fresh peaches!!

As a kid I always loved nectarines far more than peaches, maybe it was the fuzz factor.  I haven't really had peaches very often lately, but as I was cutting them up I found myself stealing a slice from each peach and really enjoying it!!  They tend to be a bit mushier than nectarines, but mushy and fuzz aside, they are delicious!

I wanted to do something different than just plain peach ice cream.  After creating the Roasted Strawberry Vinaigrette Recipe, I got the idea to roast the peaches with a bit of cinnamon.  The outcome...DELICIOUS as my grandmother said numerous times.  I hope you like it as much as my family did!!

Recipe: Dairy Free Roasted Peach Ice Cream

Ingredients

  • 1 1/2 cups fresh ripe peaches, diced (about 5)
  • 1 tsp cinnamon (or more if you want)
  • 2 cans full fat coconut milk
  • 4 egg yolks*
  • 1 tbsp vanilla
  • 1/4 - 1/2 cup sweetener (I used 1/2 cup of Swerve* for lower sugar option, plus 1 tbsp coconut palm sugar)

Instructions

  1. Combine the diced peaches and cinnamon in a bowl and mix to coat the peaches
  2. Place the peaches single layer on a parchment lined cookie sheet and bake at 400 for 20 minutes
  3. In a blender, combine the milk, egg yolks, vanilla and sweetener and 1/4 cup of the roasted peaches and blend until smooth
  4. Transfer the the mixture to a bowl and let cool in the refrigerator or freezer for a couple hours.  Skip this step if coconut milk was in the frig before hand
  5. Transfer mixture to an ice cream maker (I use the Cuisinart Ice Cream Maker) and follow it's directions
  6. Once ice cream is starting to freeze, add in the remaining peaches

Quick notes

*I use raw pastured yolks and have no problem eating them raw. If you do not want to do that, follow the directions for my Dairy Free Vanilla Bean Ice Cream on how to "cook" them first. The mixture will be warm so make sure you cool it in the frig or freezer for a while before you run it through the ice cream maker or it will never harden!

*If going the low sugar route, note that the erythritol  in Swerve hardens the ice cream completely if frozen over night.  You will need to transfer ice cream from the freezer to the frig about 30-60 minutes before you want to enjoy it.

Variations

This does not have to be done in an ice cream maker. Simply place the mixture from the blender into a container (I often times see a bread pan used) without the additional peaches and freeze. After a few hours when it has the chance to harden a bit, add in the remaining peaches. If you add them when it's still a liquid, they will all just fall to the bottom.

I have been making so much ice cream that I have cans of coconut milk in my refrigerator now so the mixture is cool to begin with.  If the mixture is room temperature, it will never freeze in the ice cream maker.  You can simply place the mixture in the frig or freezer to cool it off.  I don't want to wait those extra hours for my ice cream to be done!!!

If you want to try Swerve or need to order more, use coupon code KATE10 for a 10% discount.  Swerve is my favorite sugar replacement.  It is the only sugar alcohol that will not cause tummy troubles and it does not raise blood glucose levels.

If you are an Amazon shopper, would you be so kind to use my affiliate link to make your purchases.  It is at no cost to you, it does provide a tiny kickback to Kate’s Healthy Cupboard.  This allows me to continue making and testing recipes for free.  Thanks so much!!

Kate's Healthy Cupboard - Gluten Free Recipes
In Recipes, Desserts2 Tags Coconut Milk, Dairy Free, Ice Cream, Nut-Free, Paleo, Primal
2 Comments

Cherry Almond Upside Down Cakes

July 12, 2012 Kate
Cherry Almond Upside Down Cake

It's cherry season and I can't get enough of them!  The season seems to go by way too fast, so I am enjoying plenty of them while I can!  I need to get creative and think of some more recipes to incorporate fresh cherries in.  If you haven't tried it yet, my Dairy Free Cherry Chocolate Chip Ice Cream would be great made with fresh cherries!

Cherries are full of beneficial nutrients.  They have anti-inflammatory benefits, which can help with arthritis and many risk factors associated with heart disease.  They contain Anthocyanin, a nutrient that is beneficial for the brain and can improve memory.  Cherries are also high in beta carotene, containing 19 times more than blueberries or strawberries.  Trouble sleeping, cherries contain melatonin, a hormone that regulates the body's sleep cycles.  That's just a few reasons, but enough for me to keep indulging in them!

This recipe was inspired by a similar upside down cake recipe, but I can not remember where I saw it.  From what I remember, it used cranberries, lemon zest, orange zest, cinnamon and spices.  I think that sounds great for the fall, but for now, cherries are a must!  I don't think I have ever had upside down cake before.   I know pineapple is typically what you hear of, but I guess I have never been tempted by it.  After trying these, I'm thinking anything you pour this batter over and call an upside down cake would be fantastic!  I'm trying to think of a way to do something chocolatey and nutty...stay tuned!!!

Recipe: Cherry Almond Upside Down Cakes

Makes 6 Large Cakes

Ingredients
  • 1 1/4 cups Honeyville almond flour (Bob's may work, but these are already really moist)
  • 3/4 cup cherries, pitted and diced
  • 1/4 cup plus 2 tbsp honey (1/4-1/2 cup Swerve can be used)
  • 1/4 cup grass-fed butter or coconut oil, melted (used refined so there's no coconut flavor)
  • 2 eggs
  • 1/4 tsp vanilla bean powder (2-3 beans)
  • 2 tsp almond extract
  • 1/4 tsp celtic sea salt
  • 1/4 tsp baking soda
Instructions
  1. Combine diced cherries, 2 tbsp honey and 1/8 tsp of the vanilla beans in a bowl and mix well
  2. In a different bowl, whisk the eggs, melted butter/oil, 1/4 cup honey and the almond extract
  3. In another bowl, combine the flour, salt, 1/8 tsp vanilla beans and soda
  4. Add the dry ingredients into the bowl of egg mixture and stir until combined
  5. Pour the cherry mixture into the bottom of 6 holes of a greased muffin tin.
  6. Pour the batter over the cherry mixture, it will come close to the top
  7. Bake at 350 for 20 minutes or until brown
  8. Remove from the tins with a big spoon.
Quick notes

I used Xylitol honey which is a bit less sweet than regular honey, so I added a tbsp of erythritol to the batter too.

These can be served warm or are just as good the next day or two.  They reminded us of strawberry shortcakes with how moist they are.  They would be even more delicious right out of the oven with a dollop of Dairy Free Vanilla Bean Ice Cream!!!

If you want to try Swerve or need to order more, use coupon code KATE10 for a 10% discount.  Swerve is my favorite sugar replacement.  It is the only sugar alcohol that will not cause tummy troubles and it does not raise blood glucose levels.

If you are an Amazon shopper, would you be so kind to use my affiliate link to make your purchases.  It is at no cost to you, it does provide a tiny kickback to Kate’s Healthy Cupboard.  This allows me to continue making and testing recipes for free.  Thanks so much!!

Kate's Healthy Cupboard - Gluten Free Recipes
In Breads and Muffins, Breakfasts, Recipes, Desserts2 Tags Almond flour, Cherries, Paleo, Primal
10 Comments

Coconut Brownie Bites

July 9, 2012 Kate
Coconut Brownie Bites

Here is another recipe from my dehydrator, but should work in an oven as well.  I am loving these little bite treats when I am craving something sweet.  These brownies are rich from the cocoa, so feel free to add additional sweetener.  I think they are just perfect the way they are, but I realize we all have different thoughts on how sweet a brownie should be!

Recipe: Coconut Brownie Bites

Ingredients

  • 1/2 tsp vanilla bean powder (optional)
  • 1/2 tsp vanilla extract (add more if not using beans)
  • 1 tbsp lucuma powder (optional)
  • 1/4 - 1/2 cup honey*

Instructions

  1. Pour the coconut into a food processor and blend until small pieces are produced
  2. Add all of the remaining ingredients and blend well.
  3. Using a small cookie scoop, place each bite onto dehydrator sheets
  4. Dehydrate at 125 for 2-4 hours depending on how soft you want them
  5. Oven option: Set temp to lowest possible setting or use dehydrator setting. Bake for 1-2 hours depending on heat setting

Quick notes

*I used Xylitol honey that is less sweet than regular honey. Start with a 1/4 cup of regular honey and taste.

I have not tried these in the oven yet, so please let us know how they turn out!

Kate's Healthy Cupboard - Gluten Free Recipes
In Recipes, Desserts2, Snacks and Appetizers3 Tags Chocolate, coconut, Dehydrated, Nut-Free, Paleo, Primal, Swerve
4 Comments

Coconut Vanilla Bean Dough Bites

June 21, 2012 Kate
Raw Coconut Dough Bites

The title says it all, but I will add one more thing...MELT IN YOUR MOUTH DELICIOUS! If you like coconut, go make these and report back to us about how good they are.

I used my dehydrator for this recipe, been using it a lot lately.  These can certainly be done in an oven as well.  My oven has a dehydrator setting on it so check to see if yours has that option too.  If not, set the temperature for as low as possible (mine is 175).  I have quite a few recipes coming up that use the dehydrator.  It is a favorite among raw foodies because you are simply removing all of the moisture without cooking.  It does take a lot longer than the oven, but also allows for more nutrients to be present.  I personally prefer the dehydrator over the oven method for the treats that I have been making.  I have a very inexpensive one (for now, looking at a different one for the shape of it will make some recipes easier) that can be found at Bed, Bath and Beyond or Amazon.  It is the round Nesco that you can purchase additional trays if need be.

This recipe calls for Lucuma Powder, a superfood referred to as Inca Gold.  I have had a package of this sitting in my frig for over 6 months so I decided to finally use it! It is not necessary in this recipe, but it does add flavor.

What is Lucuma...a sweet and edible fruit of the Lucuma tree (Pouteria obovata, or Lucuma obovata), resembling a persimmon in appearance.

According to Navita Naturals, (where I order my superfoods from) Lucuma is considered a healthy alternative sweetener as it lends a sweet taste to recipes, but is very low in sugars. With naturally occurring beta-carotene, niacin, and iron, lucuma powder is a welcome antidote to notorious “empty calorie” sweeteners.  Lucuma Powder has a distinctively sweet fragrance and full-bodied, maple-like taste. A deliciously versatile dessert ingredient, lucuma blends well to make alluring smoothies, puddings, and ice creams, and can also be used as a flour in exotic pies and pastries.

Ingredients

  • 1 1/2 cups shredded coconut
  • 1/4 cup vanilla egg white protein (optional, replace with almond flour but this adds great flavor)
  • 1/2 tsp vanilla bean powder (1-2 pods)
  • 1/2 tsp vanilla ext
  • 1 tbsp Lucuma Powder (optional)
  • 3 tbsp virgin coconut oil, softened
  • 2 tbsp coconut cream/butter, softened
  • 3 tbsp liquid sweetener* (maple syrup, honey or coconut nectar)

Instructions

  1. Place the coconut, protein powder and vanilla beans into a food processor and blend until coconut reduces in size
  2. Add in the remaining ingredients and blend until a dough forms
  3. Using a small cookie scoop, place each dough bite onto dehydrator tray or onto a parchment lined cookie sheet
  4. Dehydrate at 125 for 2-4 hours
  5. Bake at 175 for 1-2 hours
  6. Check the bites regularly to see if desired level of "doughiness" has been met

Quick notes

*I used xylitol honey which is not as sweet as regular honey. I added 2 tbsp of Lakanto (erythritol) as well.

These are best right out of the dehydrator/oven.  Don't get me wrong, they are still delicious the next day too...if they last that long.  You can throw them into the dehydrator or oven for 5 minutes to reheat before you enjoy them again!  Store in an airtight container, I prefer glass.

Kate's Healthy Cupboard - Gluten Free Recipes
In Recipes, Desserts2, Snacks and Appetizers2 Tags coconut, Coconut Milk, Dehydrated, Nut-Free, Raw
1 Comment

Dairy Free Mint Chip Ice Cream

June 14, 2012 Kate
Dairy Free Mint Chip Ice Cream

Happy Birthday to my good friend Sally, this one's for you!!  Her one request was that I come up with a good dairy free mint chip ice cream, well I did!  Not only is this so darn good, it has spinach hidden in it to give it the green color.  So depending on the sweetener you use, this is a guilt free treat with the added nutrition of raw spinach!  This is the perfect way to sneak some veggies into your families food!

I have to admit, I could eat this everyday!  I have made two batches already and thinking it's time for the third!  I used an ice cream maker but I think you could simply just freeze it as well.  I would suggest letting it get soft serve consistency before you stir in chocolate chunks or they will just fall to the bottom.

Recipe: Dairy Free Mint Chip Ice Cream

Ingredients

  • 2 cans full fat coconut milk
  • 4 egg yolks
  • 1/2 cup non-dairy milk (I used So Delicious no sugar vanilla)
  • 1/4 - 1/2 cup sweetener (I used erythritol)
  • 1 tsp vanilla extract
  • 1/2 tsp peppermint flavor
  • 1/4 tsp sea salt
  • 2 handfuls of raw spinach
  • 2/3 cup dark chocolate chunks (3oz bar) or for dairy free option, use Enjoy Life Dairy Free Chips or Mega Chunks

Instructions

  1. Whisk the egg yolks in a bowl and set aside
  2. Place both milks in a saucepan and bring to a simmer, do not let it boil!
  3. Remove from heat and stir in the vanilla, peppermint, sweetener and salt
  4. Slowly add the milk a ladle full at a time to the egg yolks, whisking as you go. If the milk is too hot it will cook the eggs*
  5. Once it is all incorporated, transfer mixture to a blender and add in the spinach
  6. Blend until spinach is completely gone
  7. Pour mixture back into the bowl and place in the freezer for an hour to cool
  8. Place the mixture in an ice cream maker and follow the instructions
  9. Once the ice cream is a few minutes from being done, add in the chunks of chocolate

Quick notes

*I buy my eggs straight from the farm and feel comfortable eating them raw. I skip the heating step and just toss it all in the blender. The yolks make it more creamy but can certainly be left out.

Variations

I used an erythritol blend for my sweetener. The only drawback is that it makes the ice cream rock hard once you freeze it. I have not tried this, but supposedly some arrowroot powder or a bit of alcohol (vodka or rum) helps with this.

This is the perfect summer treat!!!

Kate's Healthy Cupboard - Gluten Free Recipes
In Recipes, Desserts2 Tags Chocolate, Coconut Milk, Dairy Free, Ice Cream, Nut-Free, Paleo, Primal
6 Comments

Banana Nut Butter Pudding Pops

June 11, 2012 Kate
Banana Nut Butter Pudding Pop

I have figured out that taking pictures of frozen treats is hard!!  They melt extremely fast, especially coconut milk based products.  I promise I will get better at popsicle pictures.  Part of the problem is I don't like the molds I am using.  I love the shape of the popsicle but not the pink and green handles that come with them.  I am going to break down and buy some stainless steel molds I've been eying and avoid plastic all together.  Please bare with me as I hide the green stick in this photo, it was ruining the picture!

Enough about the (not so good) photo...that's bugging me!  Remember pudding pops as kids?  Here is my attempt at recreating something similar and better for you!  This recipe is so quick and easy and can be created to your nut butter preference.  I did use peanut butter, but almond butter or cashew butter would be delicious too!  I may try to do an almond butter and possibly cherry as a combination as well.  Bananas are so mushy and pudding like that they work perfectly as would avocados.  Feel free to play around with different milks, fruits, yogurts or kefirs (if you tolerate dairy) and see what you can come up with!

Recipe: Banana Nut Butter Pudding Pops
Ingredients
  • 2 ripe bananas
  • 1/2 cup nut butter
  • 1 1/2 cups non-dairy milk (I used carton coconut milk)
  • 1 tsp vanilla extract
  • 1/4 tsp salt (omit if nut butter is salted)
  • 2 tbsp honey or sweetener of choice (optional)
Instructions
  1. Toss all of the ingredients into a blender or food processor and combine until smooth
  2. Pour into popsicle molds and freeze overnight

Servings: 6

Variations

This could also be done as ice cream in a machine or frozen in a bowl overnight.  Or if you don't have the patience to freeze it, you can simply enjoy it as pudding!!!

Kate's Healthy Cupboard - Gluten Free Recipes
In Recipes, Desserts2, Snacks and Appetizers2 Tags Dairy Free, Paleo, Primal
Comment

Dairy Free Ice Cream Sandwich

May 25, 2012 Kate
Ice Cream Sandwich
Ice Cream Sandwich

It's Memorial Day Weekend and this is the perfect treat for your weekend BBQ!  I simply took my Almond Butter Chocolate Chip Cookie Recipe and combined it with my Dairy Free Vanilla Bean Ice Cream Recipe.  You could also use the White Chocolate Macadamia Nut Cookies or the Dairy Free Cherry Chocolate Chip Ice Cream.  To make this completely Dairy Free, use Enjoy Life chocolate chips or chunks in place of the dark chocolate in the cookie recipe.

Enjoy your weekend!!

Kate's Healthy Cupboard - Gluten Free Recipes
In Recipes, Desserts2 Tags Chocolate, Cookies, Dairy Free, Ice Cream, Paleo, Primal
Comment

Gingersnap Cookies

March 23, 2012 Kate
Gingersnap Cookies
Gingersnap Cookies

I had a client ask if I could try to make her family's all time favorite cookie into a gluten free cookie with a little less sugar.  Gingersnaps are a favorite in my family as well, so when they approved and her family did too, I knew it was a success!!  These are a bit crunchy on the outside and oh so chewy on the inside with the perfect amount ginger. Gingersnaps are traditionally made with molasses.  Molasses is made from the cane of a sugar plant,  harvested and stripped of its leaves.  Its juice is extracted usually by crushing or mashing, but also by cutting.  The juice is boiled to concentrate it, which promotes the crystallisation of the sugar.

Molasses is an excellent source of manganese and copper. It is a very good source of iron, calcium, potassium and magnesium. In addition, molasses is a good source of vitamin B6 and selenium.

I choose to use Yacon Syrup in place of molasses in my recipes.  It is a sweetening agent extracted from the tuberous roots of the yacon plant indigenous to the Andes mountains.  I like using it because of its nutritional properties—few calories and low sugar levels.  Yacon is composed primarily of water and about 50% FOS (fructooligosaccharide).   These short chain sugars have a lower caloric value and high fiber content.  FOS can be extremely helpful to the digestive tract as it is considered a prebiotic.  Yacon Syrup is less strong than molasses.  You may need to add a bit more of it in a recipe when substituting for molasses.

Recipe: Gingersnap Cookies

Ingredients

  • 2 1/4 cups almond flour (Honeyville)
  • 4 tbsp palm shortening
  • 3 tbsp honey (use Nature's Hollow Xylitol Honey for lower sugar option)
  • 1 tbsp coconut palm sugar or Swerve
  • 1/4 - 1/3 cup yacon syrup or 1/4 cup molasses
  • 1 tsp vanilla extract
  • 2 1/2 tsp ground ginger
  • 1 tsp ground cloves
  • 1 tsp cinnamon
  • 1/4 tsp baking soda
  • 1/4 tsp celtic sea salt

Instructions

  1. Cream the shortening, honey, yacon or molasses and vanilla
  2. Combine the flour, ginger, cloves, cinnamon, coconut palm sugar or Lakanto, soda and salt
  3. Add the flour mixture to the wet mixture and stir until combined
  4. Scoop out the dough onto a parchment lined cookie sheet. (These will spread a tiny bit when cooked. If you prefer a flat cookie, press down with your palm. I pressed down just slightly)
  5. Bake at 350 for 8-10 minutes

Makes about 18 cookies

Most gingersnap recipes have you roll the dough in sugar before you bake them.  The goal was to decrease the amount of sugar in these cookies, so I eliminated that step.  We all think they are sweet enough as is.  Let us know what you think!!!

Kate's Healthy Cupboard - Gluten Free Recipes
In Recipes, Desserts2, Snacks and Appetizers2 Tags Almond flour, Cookies
3 Comments

Dairy Free Vanilla Bean Pudding

March 12, 2012 Kate
Vanilla Bean Pudding

I love easy desserts, especially desserts that have a decent amount of protein in them.  This recipe has many variations and can be made with or without added protein.  Just like the Peanut Butter Protein Balls and the Grain Free Cookie Dough Truffles, no one would ever know there was egg white protein powder in it!

Recipe: Dairy Free Vanilla Bean Pudding

Ingredients

  • 1 can full fat coconut milk (I like Thai Kitchen for the thickness)
  • 2/3 cup non-dairy milk (I like coconut or almond)
  • 2 egg yolks (optional, but makes it creamier)
  • 4 tbsp arrowroot powder
  • 1/8 tsp vanilla bean powder (1 pod, scraped)
  • 2 tbsp virgin coconut oil
  • 1/4 cup Lakanto, Wholesome Sweeteners Zero or coconut palm sugar (could try honey, maple syrup of coconut nectar in a lesser amount)
  • 1/4 cup vanilla egg white protein (optional)

Instructions

  1. In a mixing bowl whisk the egg yolks and set aside
  2. In another bowl, beat the 2/3 cup milk and the arrowroot until smooth
  3. Combine the two bowls and add the protein powder at this time, set aside
  4. Add the can of coconut milk, vanilla beans, sweetener and oil to a saucepan, slowly bring to a boil
  5. Reduce the heat and SLOWLY add the egg mixture a little at a time, stirring constantly so the eggs don't cook
  6. Continue stirring until the pudding thickens and coats the back of a spoon
  7. If protein was added or you want a smoother texture, run the mixture through a blender
  8. Pour into ramekins, jars, bowl, etc and place in the frig to set up (about 4 hours or overnight)

Quick notes

I think the vanilla beans give this a stronger flavor. If you opt for vanilla extract, add it in at the very end. I would try 1 tsp to taste.

Don't be in a hurry to take this off the stove, make sure it thickens up.

This is an easy way to fulfill a sweet craving and not feel guilty about it!!!

Kate's Healthy Cupboard - Gluten Free Recipes
In Recipes, Desserts2 Tags Dairy Free, Egg White Protein, Paleo
Comment
← Newer Posts
download.jpeg

Welcome to Kate's Healthy Cupboard! A place for healthy, grain free recipes, some low carb recipes, safe beauty and products for the home  and more...


>>  CONNECT WITH KATE  <<

pinterest.png
facebook.png
instagram.png

>>  SUBSCRIBE  <<

Success! Now check your email to confirm your subscription.

There was an error submitting your subscription. Please try again.


>>  SEARCH RECIPES  <<


Copyright 2016 Kate's Healthy Cupboard  ||  Website Design